Note
This page is automatically translated from Japanese to English. Please refer to the original Japanese page for the most accurate information.
Required Configuration
This page describes the minimum required configuration.
Package Installation
Install the following packages:
- Modular Avatar
- VRChat SDK
- VRCFury (only if using SPS)
Then, import the unitypackage purchased from Booth, and place VRCPleasure.prefab or VRCPleasure-LITE.prefab (located in the guetan/VRC_Pleasure folder) directly under the avatar.
Software Control Configuration
The 1.VRCPleasureMenu contains four control menus within the SoftwareControl. For devices you do not wish to control, set the sub-menus to EditorOnly and disable them.
![]()
SPS Socket Installation
To configure the sockets for VRCPleasure, follow these steps for every socket you wish to use:
1: Socket Configuration
- Enable
Enable Depth Animationswithin the SPS Socket component. -
Click the
+button in the bottom right corner of theSPS Socket'sSocket Depth Animationto add a new animation.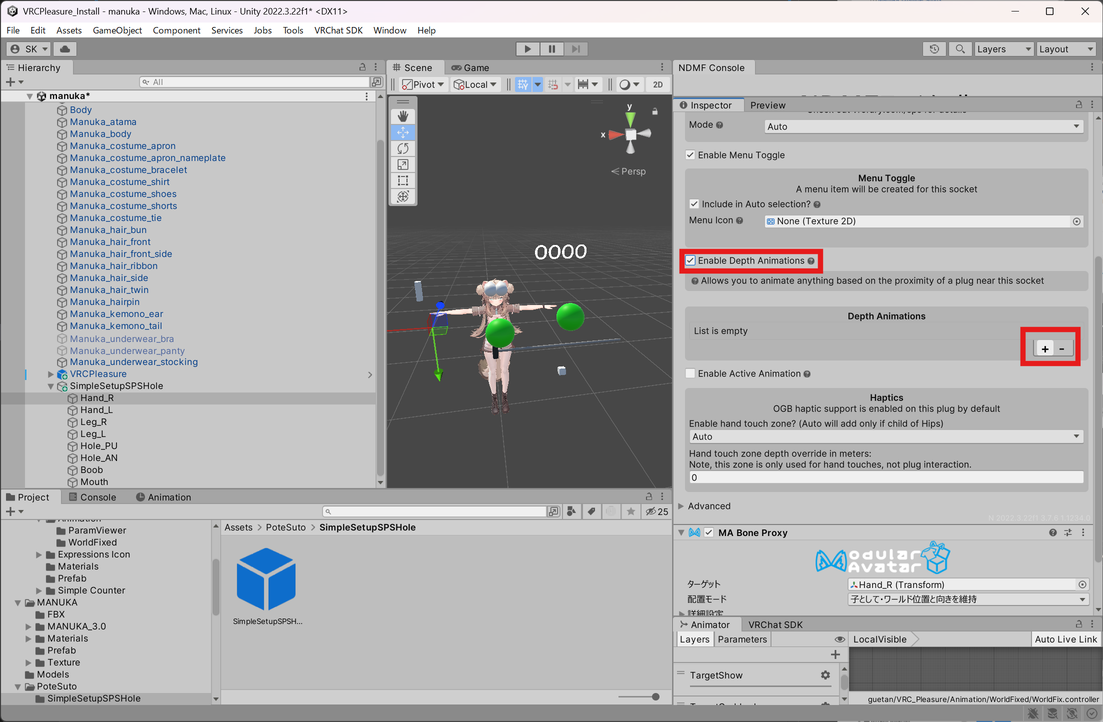
-
Select
Set an FX Floatfrom theAdd Action +menu.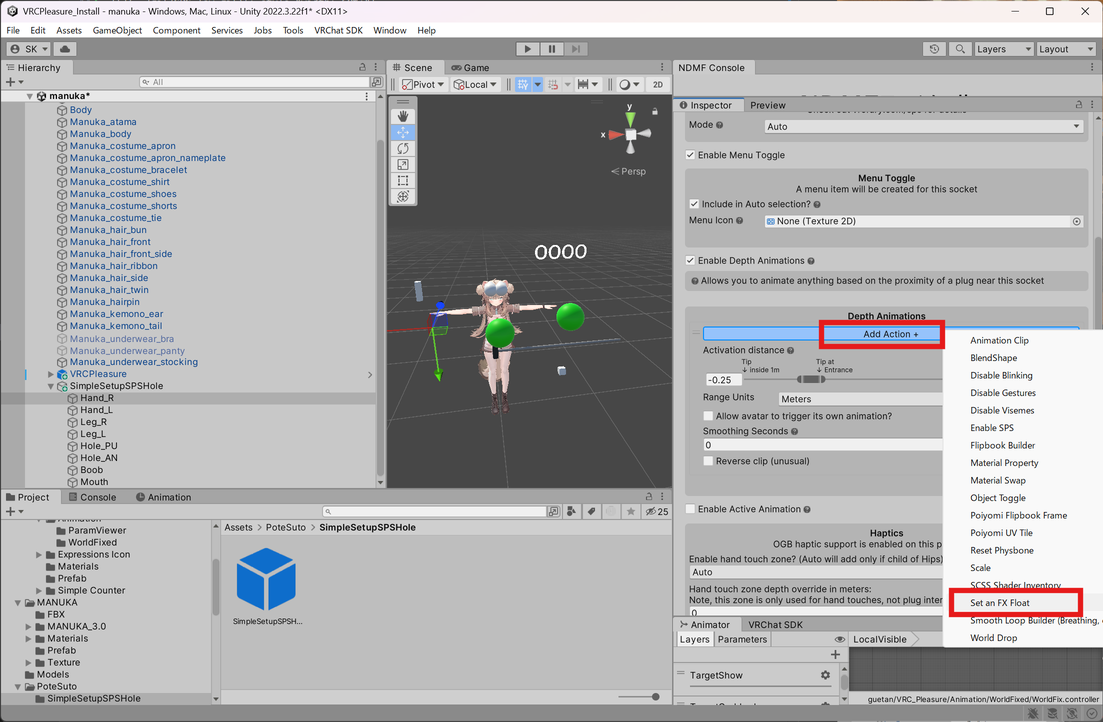
-
Set the
Set an FX FloattoSPS_Socket_Depth. - Configure the
Activation distanceas shown in the image.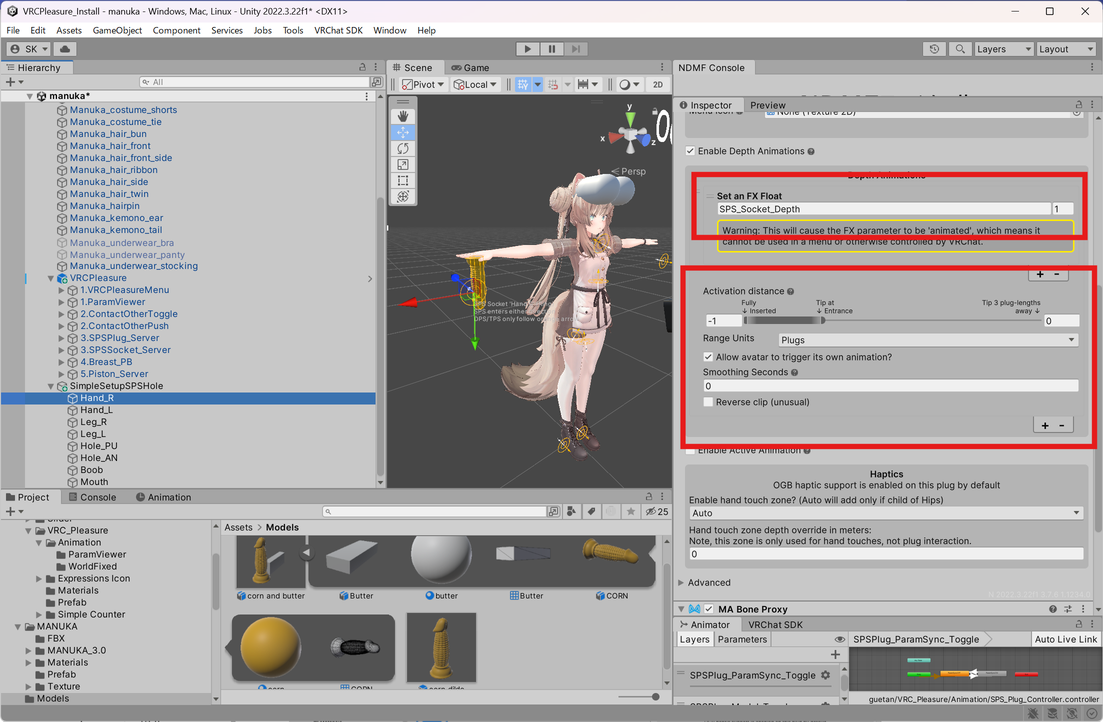
Repeat these steps for each socket you want to use.
2: SPS Haptics Configuration
Finally, select Tools/VRCFury/SPS/Upgrade legacy haptics from the toolbar.
![]() A confirmation dialog will appear; click
A confirmation dialog will appear; click Yes, Do it!.
![]()
SPS Plug Installation

1: Plug Model Position Configuration
First, place the 3.SPSPlug_Server/ObjectContainer at your desired location. Then, set the bone you want to track to the MA Bone Proxy.
![]()
2: Replacing the Plug Model
Let's use the Corn Dildo Dildo Cone (Free) for this configuration example. Delete the sample rod root and replace it with the desired model appropriately placed within SPSPlug_Server/ObjectContainer/.
![]()
3: Model SPS Plug Configuration
-
If the model does not have the
VRCFury SPS Plugcomponent, add it. -
Enable
Enable Depth Animationsat the bottom, and click the+button in the bottom right corner to add a new animation.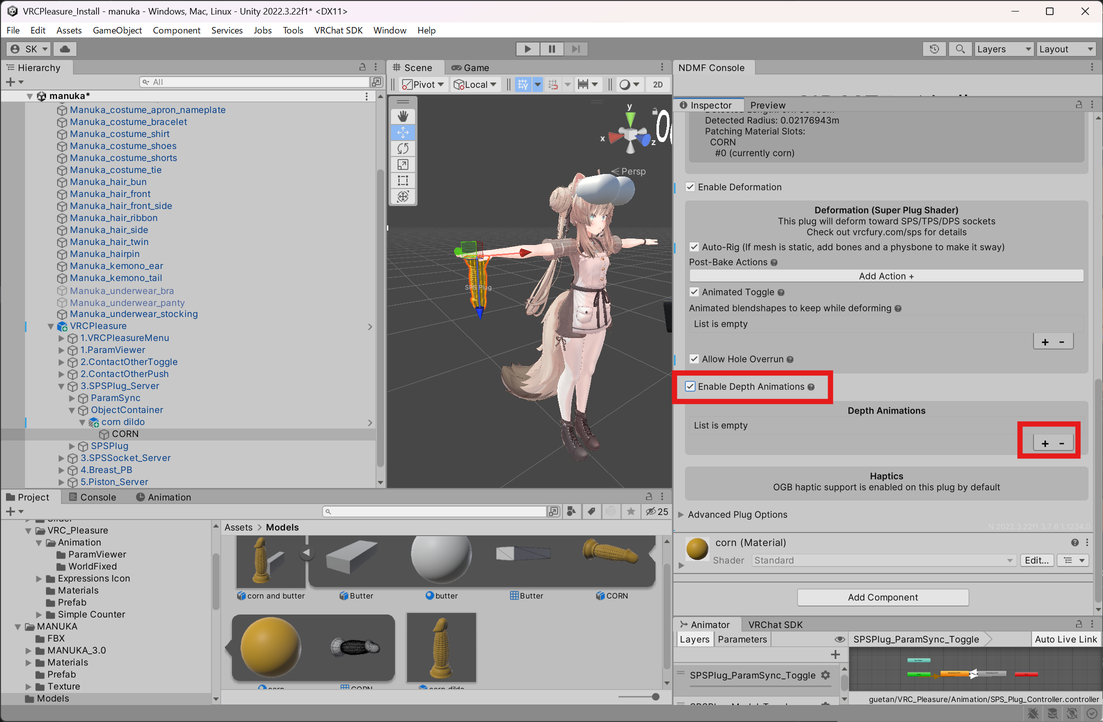
-
Select
Set an FX Floatfrom theAdd Action +menu.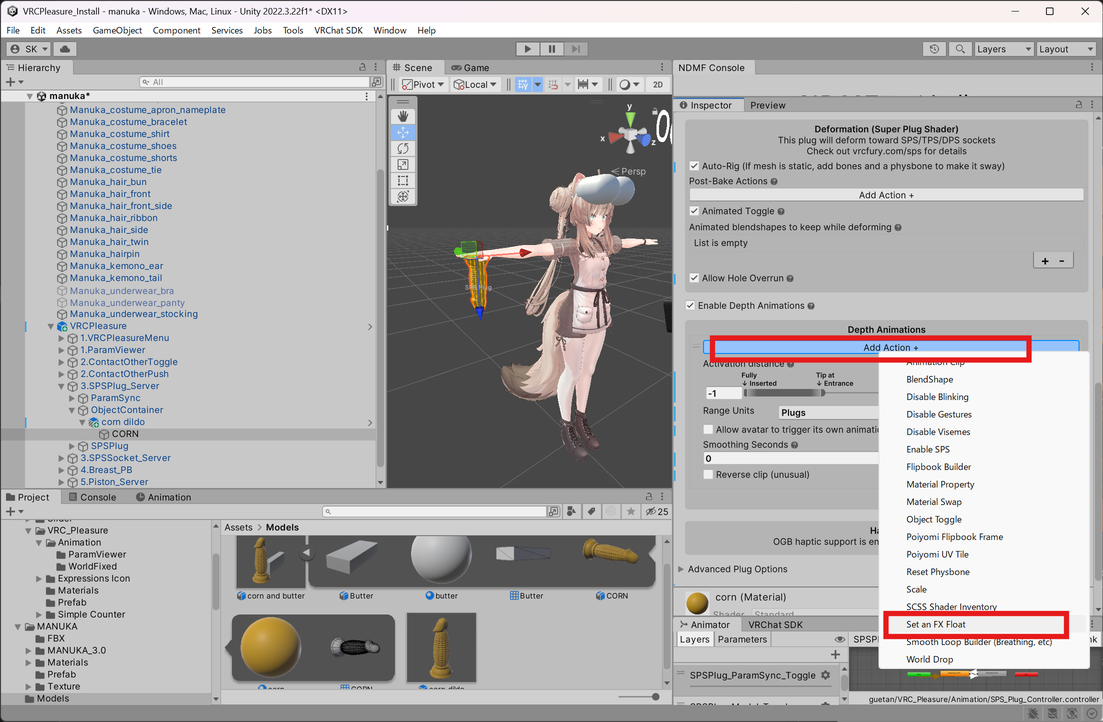
-
Set the
Set an FX FloattoSPS_Plug_Depth. - Configure the
Activation distanceas shown in the image.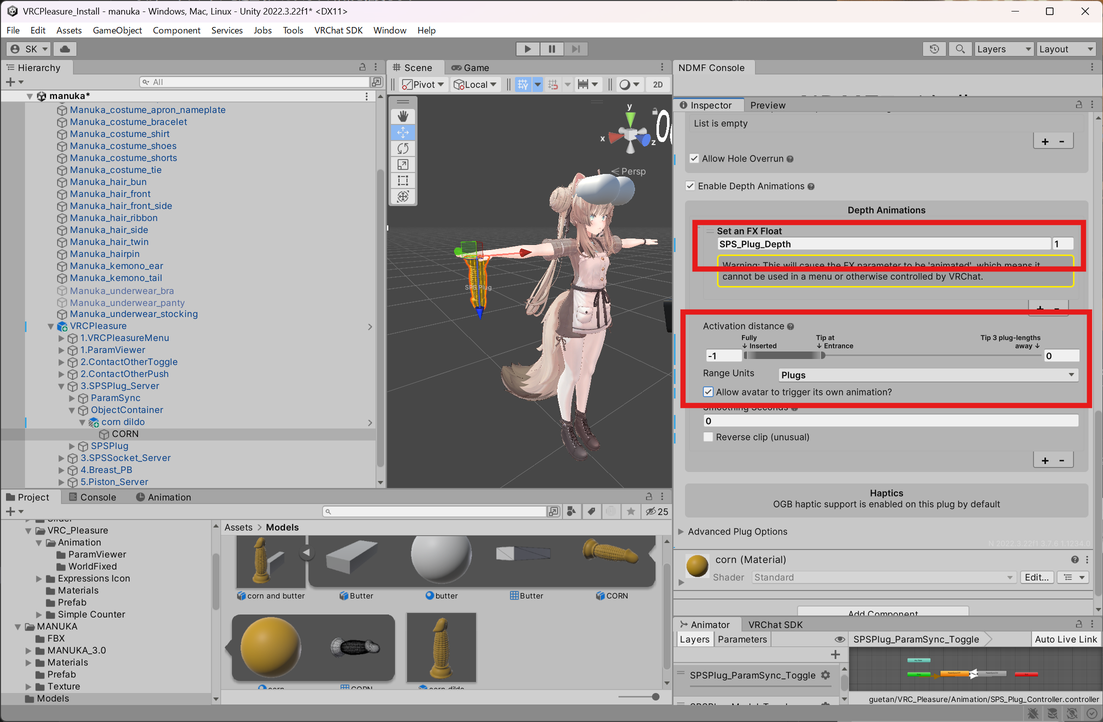
Repeat these steps for each plug you want to use.
4: SPS Haptics Configuration
Finally, select Tools/VRCFury/SPS/Upgrade legacy haptics from the toolbar.
![]() A confirmation dialog will appear; click
A confirmation dialog will appear; click Yes, Do it!.
![]()
Breast Physbone Position Configuration
Adjust the position and scale of BreastL and BreastR within 4.Breast_PB/For settings/ to position them on the avatar's breasts.
To align the left and right positions, invert the X-coordinate values of BreastL and BreastR.
![]()
Upload
All necessary configurations are now complete. Proceed with the upload.